How to use Dear ImGui and SDL2 with CMake and vcpkg (C++)
This tutorial walks through setting up CMake, vcpkg, Dear ImGui and SDL2 into a simple cross-platform (Windows, Linux) project.
Assumes basic CMake knowledge, and some C++ knowledge.
Full source code is on GitHub.
If you enjoy the post or want to help out, my social media links, as well as contact and donation options are in the about section, or at the bottom of the page.
The result of this post:
… Contained in a single .git repo, with OpenGL, CMake and git as the only hard dependencies.
Table of Contents
Motivation
CMake1 and vcpkg2 work quite well together, when set up correctly.
All it takes, then, to pull all dependencies and build, is simply having git, cmake and running cmake -S . -B build - a pretty good dev experience as far as C++ goes.
You can find an example CMakeLists.txt with vcpkg in my kv-api project on GitHub (the template will be published on GitHub soon, follow me on GitHub, or use the RSS feature of this blog as I will publish an article on it).
BUT: A lot of packages and libraries available on vcpkg do not actually give an explanation of how to use them. Dear ImGui3 is one of those - it doesn’t even come with a CMakeLists.txt file.
In this post, I aim to walk through the entire process of setting up a cross-platform GUI app using these technologies.
Integrating CMake and vcpkg
You will need git, cmake and a C++ compiler. vcpkg is not required to be installed (and will be ignored if it is).
As a demo, we will also install the fmt library via vcpkg in this tutorial.
1. Create a git repository for your project
# make folder
mkdir my-project
cd my-project
# create git repo
git init
Now add your remote(s), create some project files, etc.
2. Add vcpkg
git submodule add https://github.com/Microsoft/vcpkg.gitBy adding vcpkg as a git submodule, it is included in our source tree, while staying up-to-date. To update vcpkg later (like when you run into any “ports” related errors), simply run git -C vcpkg pull -r or similar.
3. Make a CMakeLists.txt
You can skip this step and step 4, if you already have a working cmake + vcpkg setup and cmake is set up to use the vcpkg toolchain file.
1
2
3
4
5
6
7
8
9
10
11
12
13
14
15
16
17
18
19
20
21
22
23
24
25
26
27
cmake_minimum_required(VERSION 3.16 FATAL_ERROR)

include(cmake/Vcpkg.cmake) # needs to happen before project()

project(
    "MY_PROJECT" # replace this with the name of your executable
    VERSION 0.1.0
    LANGUAGES CXX
)

# add all headers (.h, .hpp) to this
set(PRJ_HEADERS )
# add all source files (.cpp) to this, except the one with main()
set(PRJ_SOURCES )
# set the source file containing main()
set(PRJ_MAIN src/main.cpp)

# add library targets here
set(PRJ_LIBRARIES
    fmt::fmt
)

# add dependency find_package calls and similar here
find_package(fmt CONFIG REQUIRED)

add_executable(${PROJECT_NAME} ${PRJ_HEADERS} ${PRJ_SOURCES} ${PRJ_MAIN})
target_link_libraries(${PROJECT_NAME} PRIVATE ${PRJ_LIBRARIES})
This is a long file, and needs explaining.
Line 1: requires a modern version of CMake – this one assumes we want C++20, so 3.16 is reasonable, but you can change it.
Line 3: Includes cmake/Vcpkg.cmake – a file we didn’t make yet. It will bootstrap vcpkg for us, from the cloned vcpkg submodule (from step 2). Don’t worry about this just yet.
Lines 5-9: Set up the project name, version. Replace the project name and version with your own.
Lines 12, 14, 16: Variables where you add your source files. As your project grows, you will add headers and source files – simply put them here. src/main.cpp is assumed to exist, make it with a simple “hello world” file, if it doesn’t. The reason it’s separate is to make it easier to integrate with doctest or similar unit testing later.
Lines 19-21: Libraries! This is where you put targets, all these go into a target_link_libraries CMake call. If vcpkg tells you to put something there, put it here instead.
Line 24: Looks for the fmt library. This is our example dependency.
The rest of the file is default CMake stuff, like declaring a executable target.
4. Create cmake/Vcpkg.cmake
Make a folder called cmake. Create a file cmake/Vcpkg.cmake:
if(NOT CMAKE_TOOLCHAIN_FILE)
    if(NOT EXISTS ${CMAKE_SOURCE_DIR}/vcpkg/scripts/buildsystems/vcpkg.cmake)
        find_package(Git)
        if(Git_FOUND)
            # shallow-clone vcpkg (we only need the latest revision)
            execute_process(COMMAND ${GIT_EXECUTABLE} submodule update --depth=1 --init --recursive vcpkg
                            WORKING_DIRECTORY ${CMAKE_CURRENT_SOURCE_DIR}
                            RESULT_VARIABLE GIT_SUBMOD_RESULT)
            if(NOT GIT_SUBMOD_RESULT EQUAL "0")
                message(SEND_ERROR "Checking out vcpkg in source tree failed with ${GIT_SUBMOD_RESULT}.")
            endif()
        else()
            message(FATAL_ERROR "Could not find git or vcpkg.cmake. Please either, install git and re-run cmake (or run `git submodule update --init --recursive`), or install vcpkg and add `-DCMAKE_TOOLCHAIN_FILE=<path-to-vcpkg>/scripts/buildsystems/vcpkg.cmake` to your cmake invocation. Please try again after making those changes.")
        endif()
    endif()
    set(CMAKE_TOOLCHAIN_FILE ${CMAKE_SOURCE_DIR}/vcpkg/scripts/buildsystems/vcpkg.cmake)
endif()
This is quite complicated, but what it does is quite simple:
- Checks if the vcpkg git submodule is checked out. If not, finds
git(orgit.exe), and runsgit submodule update --init --recursive vcpkgto clone it. - Sets the
CMAKE_TOOLCHAIN_FILEto thevcpkg.cmaketoolchain file included invcpkg.
This causes the vcpkg submodule to be checked out if it wasn’t (it won’t be if someone just clones your repo), and then causes vcpkg to be used as the toolchain file, which causes vcpkg to bootstrap (“install”) itself (just locally in the build folder).
5. Create vcpkg.json
vcpkg.json specifies our dependencies. The find_package() call in the CMakeLists.txt only finds a dependency if it’s actually installed! vcpkg installs it for us, if its specified in the vcpkg.json. This way of using vcpkg is called “manifest mode”.
{
  "name": "my-project",
  "version-string": "0.1.0",
  "dependencies": [
      "fmt"
  ]
}
Here, again, replace name and version-string to match your project’s name and version (if you want).
In the dependencies array, we can see the fmt dependency. You can find these package names on vcpkg.io2, but they are usually intuitive.
6. Add Dear ImGui and bindings
Now to add SDL2 and ImGui! In this example, we will use Dear ImGui with SDL2 and OpenGL3 support. I recommend you follow along with this for now.
To your vcpkg.json, add the dependencies imgui and sdl2 with the relevant features enabled:
{
  "name": "my-project",
  "version-string": "0.1.0",
  "dependencies": [
    "fmt",
    "sdl2",
    {
      "name": "imgui",
      "features": [
        "opengl3-binding",
        "sdl2-binding"
      ]
    },
    "opengl"
  ]
}
A vcpkg.json dependency may specify additional features – this is necessary here, as only the imgui package itself doesn’t include the opengl3 or sdl2 bindings needed.
Next, to your CMakeLists.txt, modify the PRJ_LIBRARIES so it looks as follows:
set(PRJ_LIBRARIES
    fmt
    # sdl2
    $<TARGET_NAME_IF_EXISTS:SDL2::SDL2main>
    $<IF:$<TARGET_EXISTS:SDL2::SDL2>,SDL2::SDL2,SDL2::SDL2-static>
    # imgui
    imgui::imgui
    # opengl
    OpenGL::GL
)
… And finally, add the following below the similar call to find_package(fmt...:
find_package(SDL2 CONFIG REQUIRED)
find_package(imgui CONFIG REQUIRED)
find_package(OpenGL REQUIRED)
NOTE: You will need to make sure, if you’re not on Windows, that you do have OpenGL installed.
7. Write ImGui + SDL2 code
Create src/main.cpp if you didn’t already, and write the following code:
#include <fmt/core.h>

int main() {
    fmt::print("hello, world!\n");
}
Now is a good time to run cmake and see if it builds. This may be a point where any issues or missing packages will become apparent.
# configure step
cmake -S . -B bin
# build
cmake --build bin
This may take a while the first time you run (the configure step downloads and builds the dependencies). It should run without issues. If you run into problems, make sure you executed all steps properly. The vcpkg CMake output may also show you possible fixes, such as installing other packages on the system.
You should now have an executable in the bin folder. On Linux, you are likely to find it in ./bin/<name> where <name> is the name you gave your project in the CMakeLists.txt. On Windows, it will likely be in ./bin/Debug/ in a subfolder somewhere, named <name>.exe (again, <name> will be the name of the project). Running it should print “hello, world!”.
If this works without issues, move on to write more code. In the following part, we just adapted the example from ImGui to use the right #includes, and to make it easier to read and less complicated.
This is quite long - you can pull the full source code from GitHub.
// ImGui + SDL2
#include <SDL2/SDL.h>
#include <imgui.h>
#include <imgui_impl_opengl3.h>
#include <imgui_impl_sdl2.h>
#if defined(IMGUI_IMPL_OPENGL_ES2)
#include <SDL2/SDL_opengles2.h>
#else
#include <SDL2/SDL_opengl.h>
#endif
// fmt
#include <fmt/core.h>
// adapted from https://github.com/ocornut/imgui/tree/bb224c8aa1de1992c6ea3483df56fb04d6d1b5b6/examples/example_sdl2_opengl3
// to remove apple / macos support,
// and to remove useless code irrelevant to this tutorial.
// reformatted, too.
int main() {
if (SDL_Init(SDL_INIT_EVERYTHING) != 0) {
fmt::print("SDL_Init failed: {}\n", SDL_GetError());
return -1;
}
// Decide GL+GLSL versions
#if defined(IMGUI_IMPL_OPENGL_ES2)
// GL ES 2.0 + GLSL 100
const char* glsl_version = "#version 100";
SDL_GL_SetAttribute(SDL_GL_CONTEXT_FLAGS, 0);
SDL_GL_SetAttribute(SDL_GL_CONTEXT_PROFILE_MASK, SDL_GL_CONTEXT_PROFILE_ES);
SDL_GL_SetAttribute(SDL_GL_CONTEXT_MAJOR_VERSION, 2);
SDL_GL_SetAttribute(SDL_GL_CONTEXT_MINOR_VERSION, 0);
#else
// GL 3.0 + GLSL 130
const char* glsl_version = "#version 130";
SDL_GL_SetAttribute(SDL_GL_CONTEXT_FLAGS, 0);
SDL_GL_SetAttribute(SDL_GL_CONTEXT_PROFILE_MASK, SDL_GL_CONTEXT_PROFILE_CORE);
SDL_GL_SetAttribute(SDL_GL_CONTEXT_MAJOR_VERSION, 3);
SDL_GL_SetAttribute(SDL_GL_CONTEXT_MINOR_VERSION, 0);
#endif
// From 2.0.18: Enable native IME.
#ifdef SDL_HINT_IME_SHOW_UI
SDL_SetHint(SDL_HINT_IME_SHOW_UI, "1");
#endif
// Create window with graphics context
SDL_GL_SetAttribute(SDL_GL_DOUBLEBUFFER, 1);
SDL_GL_SetAttribute(SDL_GL_DEPTH_SIZE, 24);
SDL_GL_SetAttribute(SDL_GL_STENCIL_SIZE, 8);
SDL_WindowFlags window_flags = (SDL_WindowFlags)(SDL_WINDOW_OPENGL | SDL_WINDOW_RESIZABLE | SDL_WINDOW_ALLOW_HIGHDPI);
SDL_Window* window = SDL_CreateWindow("LionKor's SDL2 + ImGui Example", SDL_WINDOWPOS_CENTERED, SDL_WINDOWPOS_CENTERED, 1280, 720, window_flags);
SDL_GLContext gl_context = SDL_GL_CreateContext(window);
SDL_GL_MakeCurrent(window, gl_context);
SDL_GL_SetSwapInterval(1); // Enable vsync
// Setup Dear ImGui context
IMGUI_CHECKVERSION();
ImGui::CreateContext();
ImGuiIO& io = ImGui::GetIO();
(void)io;
io.ConfigFlags |= ImGuiConfigFlags_NavEnableKeyboard; // Enable Keyboard Controls
io.ConfigFlags |= ImGuiConfigFlags_NavEnableGamepad; // Enable Gamepad Controls
// Setup Dear ImGui style
ImGui::StyleColorsDark();
// ImGui::StyleColorsLight();
// Setup Platform/Renderer backends
ImGui_ImplSDL2_InitForOpenGL(window, gl_context);
ImGui_ImplOpenGL3_Init(glsl_version);
ImVec4 clear_color = ImVec4(0.45f, 0.55f, 0.60f, 1.00f);
// Main loop
bool done = false;
while (!done) {
// Poll and handle events (inputs, window resize, etc.)
// You can read the io.WantCaptureMouse, io.WantCaptureKeyboard flags to tell if dear imgui wants to use your inputs.
// - When io.WantCaptureMouse is true, do not dispatch mouse input data to your main application, or clear/overwrite your copy of the mouse data.
// - When io.WantCaptureKeyboard is true, do not dispatch keyboard input data to your main application, or clear/overwrite your copy of the keyboard data.
// Generally you may always pass all inputs to dear imgui, and hide them from your application based on those two flags.
SDL_Event event;
while (SDL_PollEvent(&event)) {
ImGui_ImplSDL2_ProcessEvent(&event);
if (event.type == SDL_QUIT)
done = true;
if (event.type == SDL_WINDOWEVENT && event.window.event == SDL_WINDOWEVENT_CLOSE && event.window.windowID == SDL_GetWindowID(window))
done = true;
}
// Start the Dear ImGui frame
ImGui_ImplOpenGL3_NewFrame();
ImGui_ImplSDL2_NewFrame();
ImGui::NewFrame();
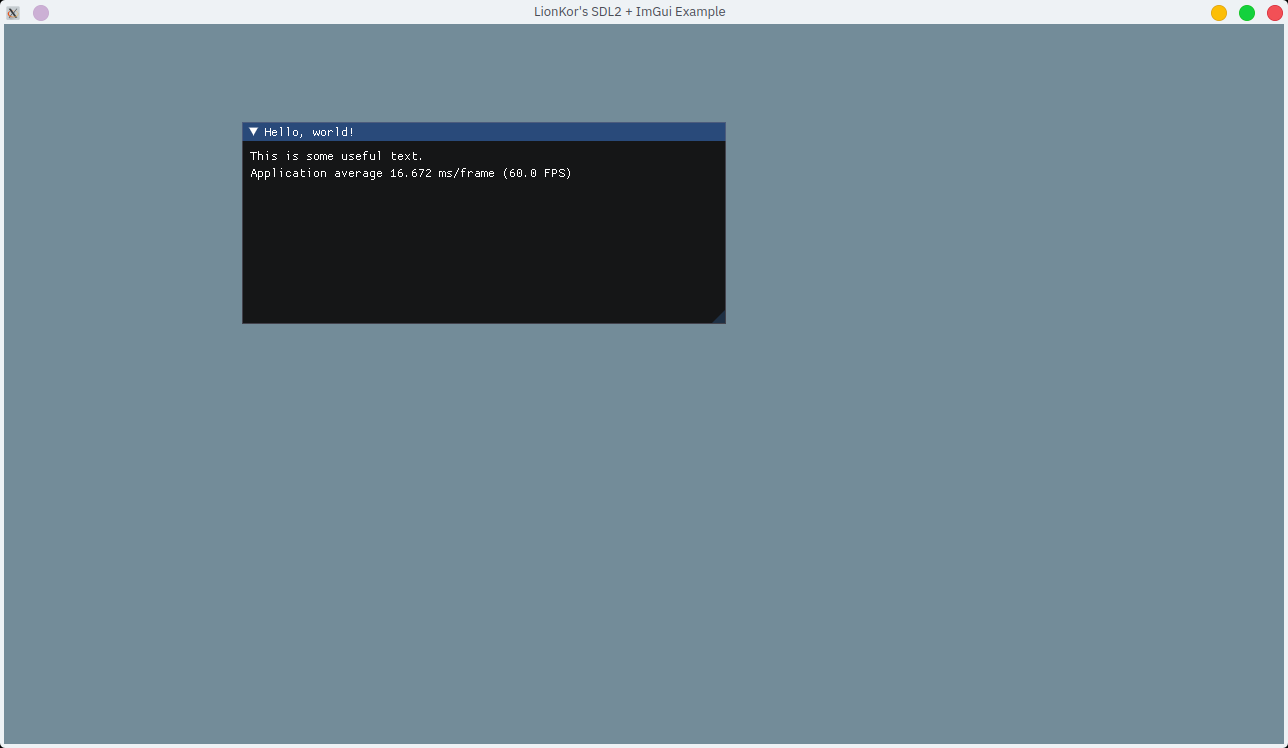
ImGui::Begin("Hello, world!"); // Create a window called "Hello, world!" and append into it.
ImGui::Text("This is some useful text."); // Display some text (you can use a format strings too)
ImGui::Text("Application average %.3f ms/frame (%.1f FPS)", 1000.0f / io.Framerate, io.Framerate);
ImGui::End();
// Rendering
ImGui::Render();
glViewport(0, 0, (int)io.DisplaySize.x, (int)io.DisplaySize.y);
glClearColor(clear_color.x * clear_color.w, clear_color.y * clear_color.w, clear_color.z * clear_color.w, clear_color.w);
glClear(GL_COLOR_BUFFER_BIT);
ImGui_ImplOpenGL3_RenderDrawData(ImGui::GetDrawData());
SDL_GL_SwapWindow(window);
}
// Cleanup
ImGui_ImplOpenGL3_Shutdown();
ImGui_ImplSDL2_Shutdown();
ImGui::DestroyContext();
SDL_GL_DeleteContext(gl_context);
SDL_DestroyWindow(window);
SDL_Quit();
return 0;
}8. Running & next steps
If you ran the code before, when it was a “hello world”, you can skip the configure step, and just run the build step.
# configure step
cmake -S . -B bin
# build
cmake --build bin
Now, you are set up and can start developing your application.
It should look like this when run:
For your convenience, I’ve left some resources for learning SDL2, OpenGL and ImGui here, though you can skip all setup code for SDL2, ImGui and OpenGL (like GLEW, GLFW, etc.) as that’s included in the code from this tutorial.
If you enjoy the post or want to help out, my social media links, as well as contact and donation options are in the about section, or at the bottom of the page.
Troubleshooting
If you run into issues, here is a collection of common problems and solutions I ran into while researching / writing this post.
Sanity checks
Please carefully walk through these points and check all of them. After, try again.
- Ensure
gitis installed.git --versionshould run without errors. - Ensure
cmakeis installed.cmake --versionshould run without errors. - Ensure you have a C++ compiler installed. For example, on Linux,
cxx --versionshould work without errors. On windows, you need the Windows SDK installed (included with Visual Studio (not Visual Studio Code)). - Ensure your C++ compiler supports a recent version of the C++ standard, such as C++17.
- Ensure OpenGL is installed and working. For example, on Linux, you can install and run
glxgears, orglinfo. - Pull the source code from GitHub and try it out. That way, you can check if you missed something.
vcpkg error(s)
If you get vcpkg errors, you may need to update vcpkg. For this, run the following from your project’s root directory:
git -C vcpkg fetch
git -C vcpkg checkout master
or simply git -C vcpkg pull. This can sometimes fail - but basically, you want to update vcpkg by checking out the latest commit.